
Are you staring at a complex guitar scales diagram and feeling completely lost? You see a grid of lines and a bunch of dots, and it feels more like a cryptic puzzle than a musical tool. Many guitarists, especially those checking out our beginner guitar tips, feel this exact same way.
You know that scales are the building blocks of solos and melodies. Moreover, you’ve been told that learning them is the secret to breaking free from playing the same old licks. But every time you try, you hit a wall of confusion.
This article is the key. We’re going to shred that confusion and turn those puzzling diagrams into a clear map. As a result, you will be able to navigate the entire fretboard with newfound confidence and skill.

The Simple Guitar Practice System That Eliminates Guesswork
So You Can Stop Stalling… and Start Sounding Better Every Time You Pick Up the Guitar
👉 Get 52 Practice Prompts Now!
Why Scales Feel Like a Foreign Language
Let’s be honest. You’ve downloaded cheat sheets and looked at countless scale charts online. However, they all seem to present the same problem. They are just a collection of shapes without any context.
You might even be able to memorize a box pattern or two. You can move your fingers up and down the shape just like the diagram shows. But the moment the backing track changes key, or you try to move to a different part of the neck, you’re stuck.
This happens because you’ve only learned the what, not the why or the how. A static guitar scales diagram doesn’t teach you how the notes relate to each other or how to use them musically. It’s like having a map of a single city block but no idea how it connects to the rest of the city. Therefore, you end up trapped in a small, repetitive box, unable to explore.

The real goal is to turn those dots into music. It’s about understanding the language of the fretboard so you can speak it fluently, not just recite memorized phrases.
Decoding the Secret Language of Diagrams
Before you can play a scale, you must first learn to read its map. Fortunately, these diagrams are far simpler than they appear. Once you understand the basic components, you’ll be able to read any of them in seconds.
Think of a scale diagram as a snapshot of your fretboard, stood up vertically.
- The Vertical Lines: These six lines represent your six guitar strings. The line on the far left is your low E string (the thickest one). The line on the far right is your high E string (the thinnest one).
- The Horizontal Lines: These represent the frets on your guitar. The line at the very top is often thicker, representing the nut (on an open position diagram), or it will have a number next to it, like “5fr,” indicating that the diagram starts at the 5th fret.
- The Dots: These are the most important part. Specifically, the dots show you which notes to play. Each dot tells you what string and what fret to press down.
Furthermore, you will often find two special kinds of dots:
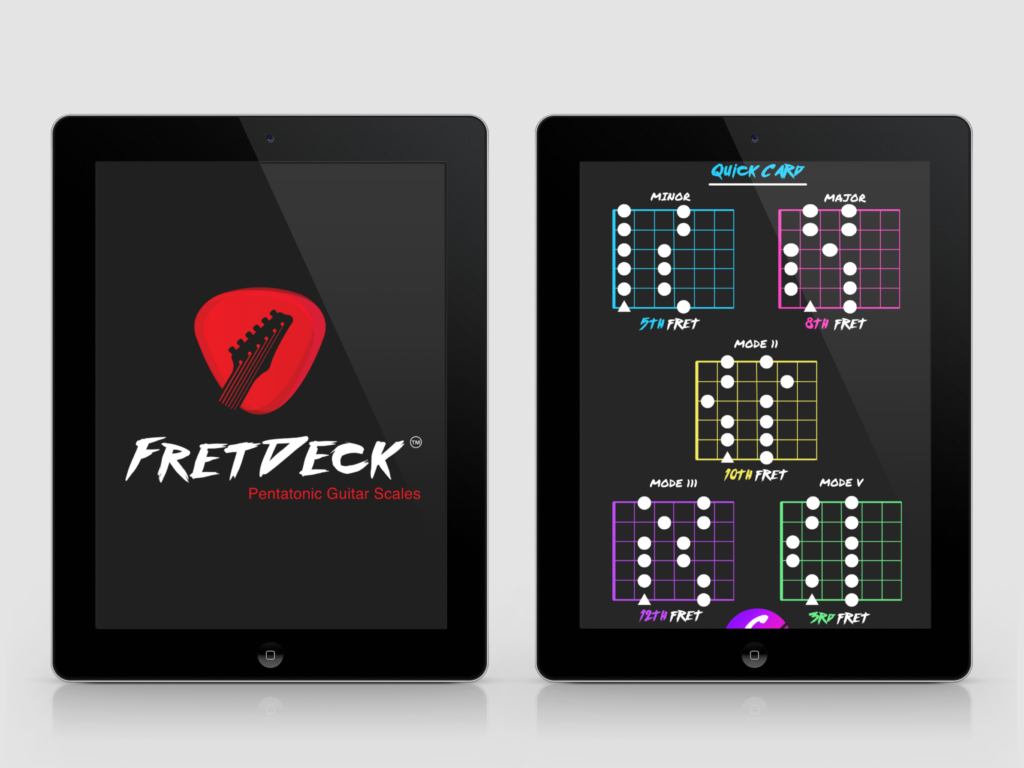
- The Root Note: One dot will look different. It might be a different color, be hollow, or have an “R” on it. This is your root note, the foundational note that gives the scale its name (for example, the “A” in the A Minor Pentatonic scale). It’s your home base.
- The Numbered Dots: Sometimes, dots have numbers inside them (1, 2, 3, 4). These numbers are simply a suggested fingering. For example, “1” is your index finger, “2” is your middle finger, “3” is your ring finger, and “4” is your pinky.
Grasping these simple elements is the first major step. You’ve now translated the code.
How to Read Any Guitar Scales Diagram Instantly
Now that you know what the symbols mean, let’s put it into practice. Reading a guitar scales diagram and applying it to your fretboard is a simple, repeatable process.
First, orient yourself. Look at the diagram and identify where it starts. If there’s no fret number listed, it’s likely an open position scale near the nut. If you see “3fr” or “5fr”, for instance, that means the top horizontal line of the diagram corresponds to the 3rd or 5th fret on your guitar. Your hand should be in that position.
Second, find the root note. Always locate the “R” or specially marked dot first. Playing this note helps you hear the tonal center of the scale, which is crucial for making your playing sound musical. It anchors your ear and your fingers.
Third, play the notes in order. Start on the lowest string (usually the low E on the left) and play the notes on that string as shown. Then, move to the next string (the A string) and do the same. Continue this process all the way up to the high E string.
Finally, play it back down. Once you reach the highest note in the pattern, reverse the process. Play the notes on the high E string, then the B string, and so on, until you’re back where you started. This process, known as ascending and descending, builds muscle memory and solidifies the pattern in your mind and fingers. Using a structured best practice routine will accelerate this process immensely.
This simple four-step process works for every single guitar scales diagram you will ever encounter.
From Shapes to Music: The True Purpose of Scales
Here is the secret that separates amateurs from pros: scales are not just finger exercises. Their true purpose is to be a framework for creating melodies and improvising solos. Memorizing one box pattern is a start, but the real magic happens when you see how these patterns connect all over the neck.
Most scales, like the incredibly useful Minor Pentatonic, have five different connecting shapes or positions. Think of it like this: the guitar scales diagram you just learned is “Position 1.” There are four other positions that link up with it, allowing you to play the same scale anywhere on the fretboard. You never have to feel trapped in one box again.
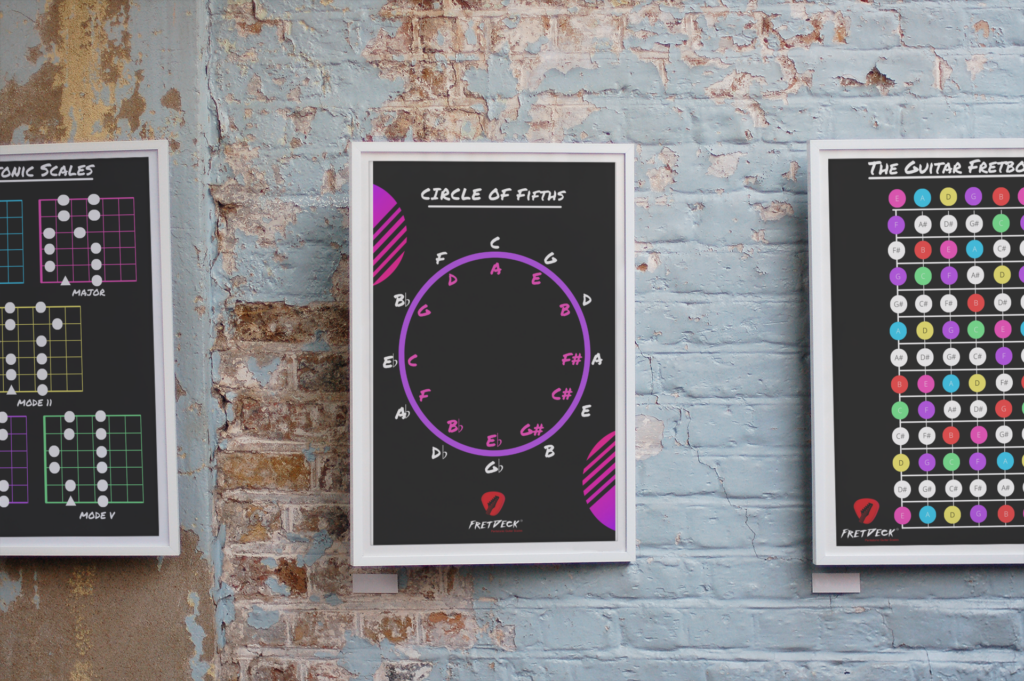
This is where you move beyond simply reading a diagram and start internalizing the fretboard. The goal is to see the neck not as a collection of frets but as an interconnected map of notes you can use. As you get more advanced, you can use tools like the FretDeck card system to quickly visualize and practice these connections without being tied to a screen.
For example, once you learn the A Minor Pentatonic scale in the 5th position, you can then learn it in the 8th position, the 10th position, and so on. You’ll quickly discover that the notes are all the same, just arranged in a new, comfortable fingering pattern for that area of the neck. For an excellent breakdown of this concept, Fender provides a great lesson on connecting pentatonic shapes.
As a result, you can flow seamlessly from one part of the fretboard to another in the middle of a solo, following the music wherever it leads you.
The Simple Guitar Practice System That Eliminates Guesswork
So You Can Stop Stalling… and Start Sounding Better Every Time You Pick Up the Guitar
👉 Get 52 Practice Prompts Now!
5 Actionable Steps to Master Scales Today
Theory is great, but action is what creates progress. Use these five steps to go from looking at a scale diagram to actually using it in your playing.
1. Start With One Shape. Don’t try to learn all five positions of a scale at once. That’s a recipe for overwhelm. Pick one guitar scales diagram for one position of the Minor Pentatonic scale and commit to mastering it. 2. Say the Notes Out Loud. As you play each note in the scale, say its name (e.g., A, C, D, E, G). This builds a powerful connection between your hands, your ears, and your brain. It turns a physical exercise into a musical one. 3. Use a Metronome. This is non-negotiable. Set a metronome to a slow tempo (like 60 bpm) and play one note per click. As you get more comfortable, you can increase the speed or play eighth notes (two notes per click). Guitar World has a great guide on practicing with a metronome. 4. Find a Backing Track. Once you’re comfortable playing the scale up and down, it’s time to apply it. Find a backing track on YouTube in the same key as your scale (e.g., “A Minor backing track”). Now, instead of playing the scale in order, try to create small melodies using only the notes from the scale. 5. Connect it to Chords. The ultimate goal is to understand how scales and chords relate. Learning how a scale fits over a simple chord progression guide is the key to truly musical soloing. Begin by noticing how the root note of the scale often lines up with the root note of the chords.
Frequently Asked Questions
What’s the most important scale to learn first?
Without a doubt, the Minor Pentatonic scale. It’s a simple 5-note scale that is used in countless rock, blues, pop, and country songs. It’s easy to learn, sounds fantastic, and is the perfect gateway to understanding how to learn guitar scales and improvisation.
How do numbers on a guitar scales diagram work?
Numbers found inside the dots (1, 2, 3, 4) are fingering suggestions. They tell you which finger on your fretting hand to use: 1 for index, 2 for middle, 3 for ring, and 4 for pinky. Following these suggestions promotes good technique and makes playing the scale more efficient.
Should I learn all scale positions at once?
No, that can lead to frustration and burnout. The best approach is to master one position completely. Once you can play it cleanly, use it over a backing track, and can find the root note without thinking, then you are ready to move on to the next connecting position.
The Simple Guitar Practice System That Eliminates Guesswork
So You Can Stop Stalling… and Start Sounding Better Every Time You Pick Up the Guitar
👉 Get 52 Practice Prompts Now!
The Simple Guitar Practice System That Eliminates Guesswork
So You Can Stop Stalling… and Start Sounding Better Every Time You Pick Up the Guitar
👉 Get 52 Practice Prompts Now!